DeepAI is a research company that develops a wide variety of deep neural network (DNN) models using the bleeding edge of AI research. For example, they have built models for sentiment analysis of text, nudity detection, artistic style transfer, text summarization, etc. One model that I was particularly interested in using was the Image Colorization that adds realistic coloration to old black-and-white photos. In this post, I show how easy it is to use DeepAI’s API for this model to color your own images automatically using Python.
Overview#
Using the API is very simple. The first step is to get an API key from DeepAI. Then, we just need to use the ‘requests’ package to send black-and-white photos and download the colorized results. Each step is explained in more detail below and a full working Python script is available at the bottom.
Examples#
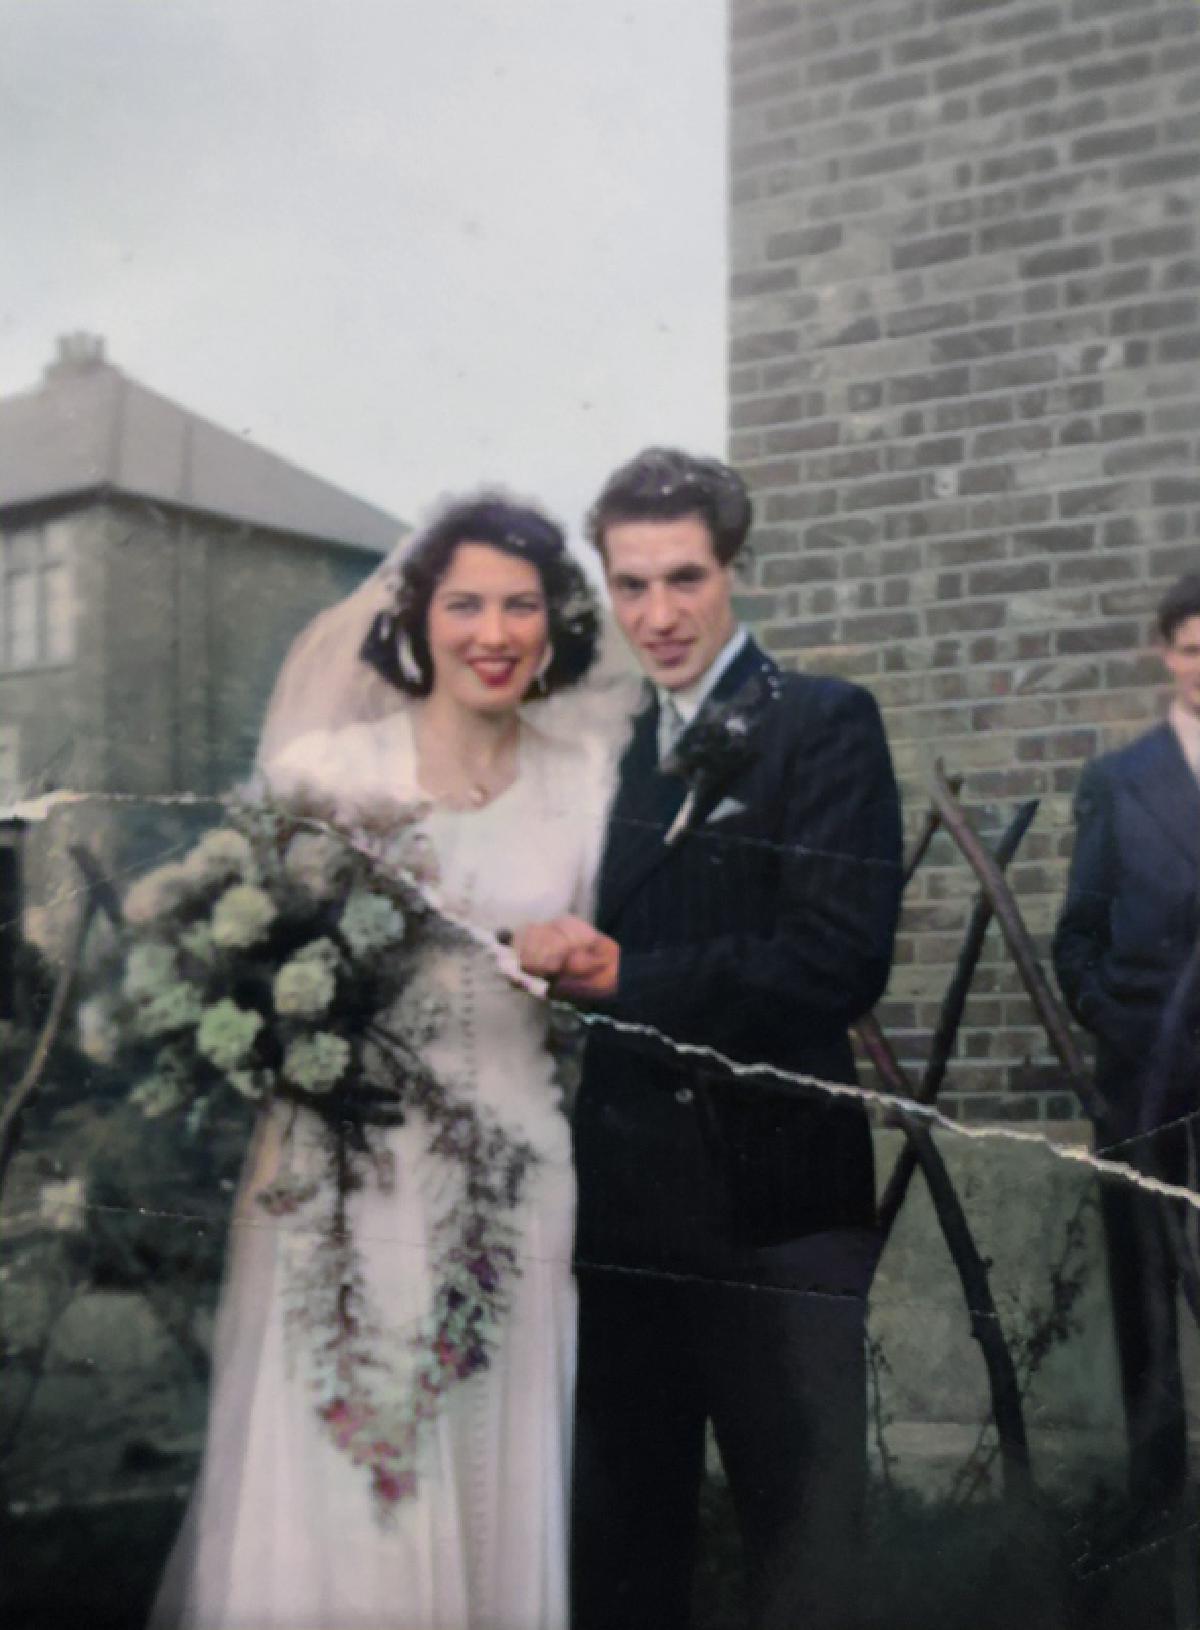
For inspiration, here are some examples of the Image Colorization DNN at work.
| Original | Colorized |
|---|---|
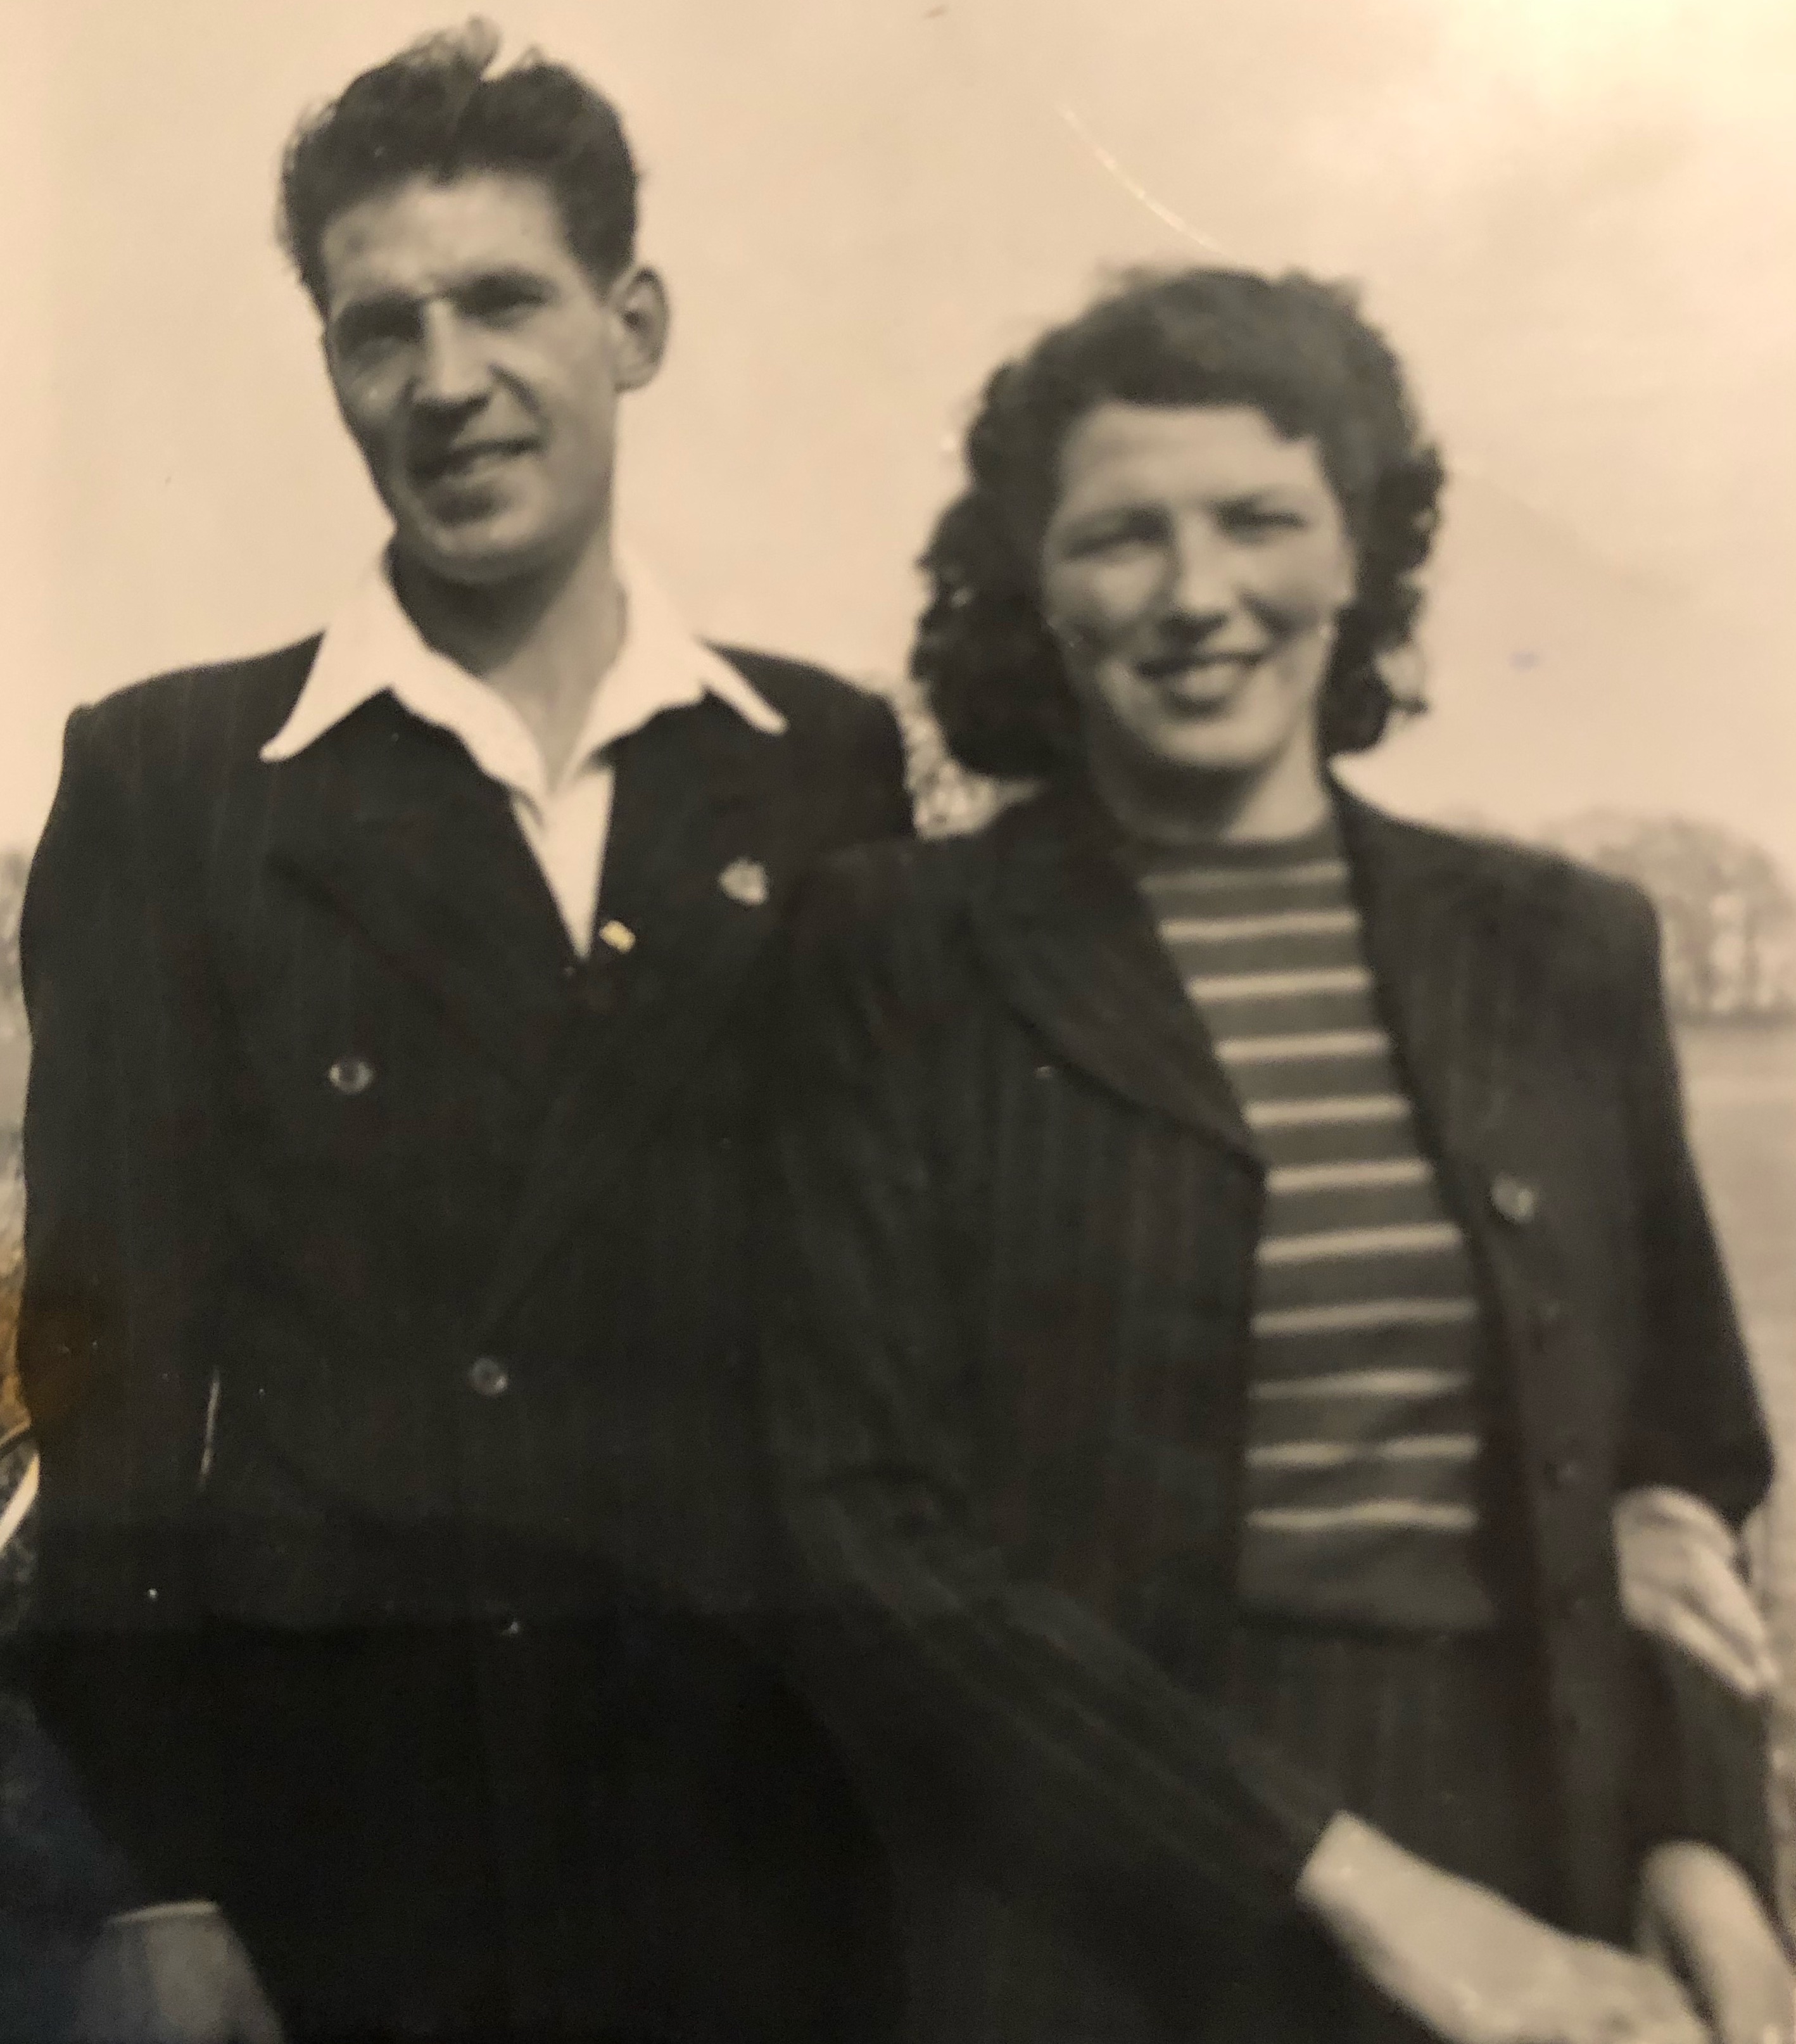 | 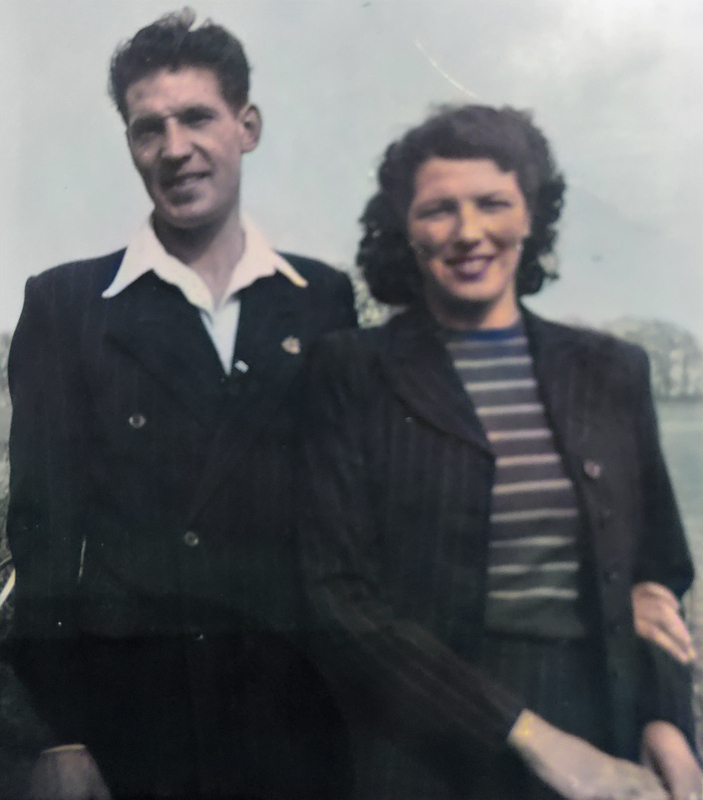 |
 |  |
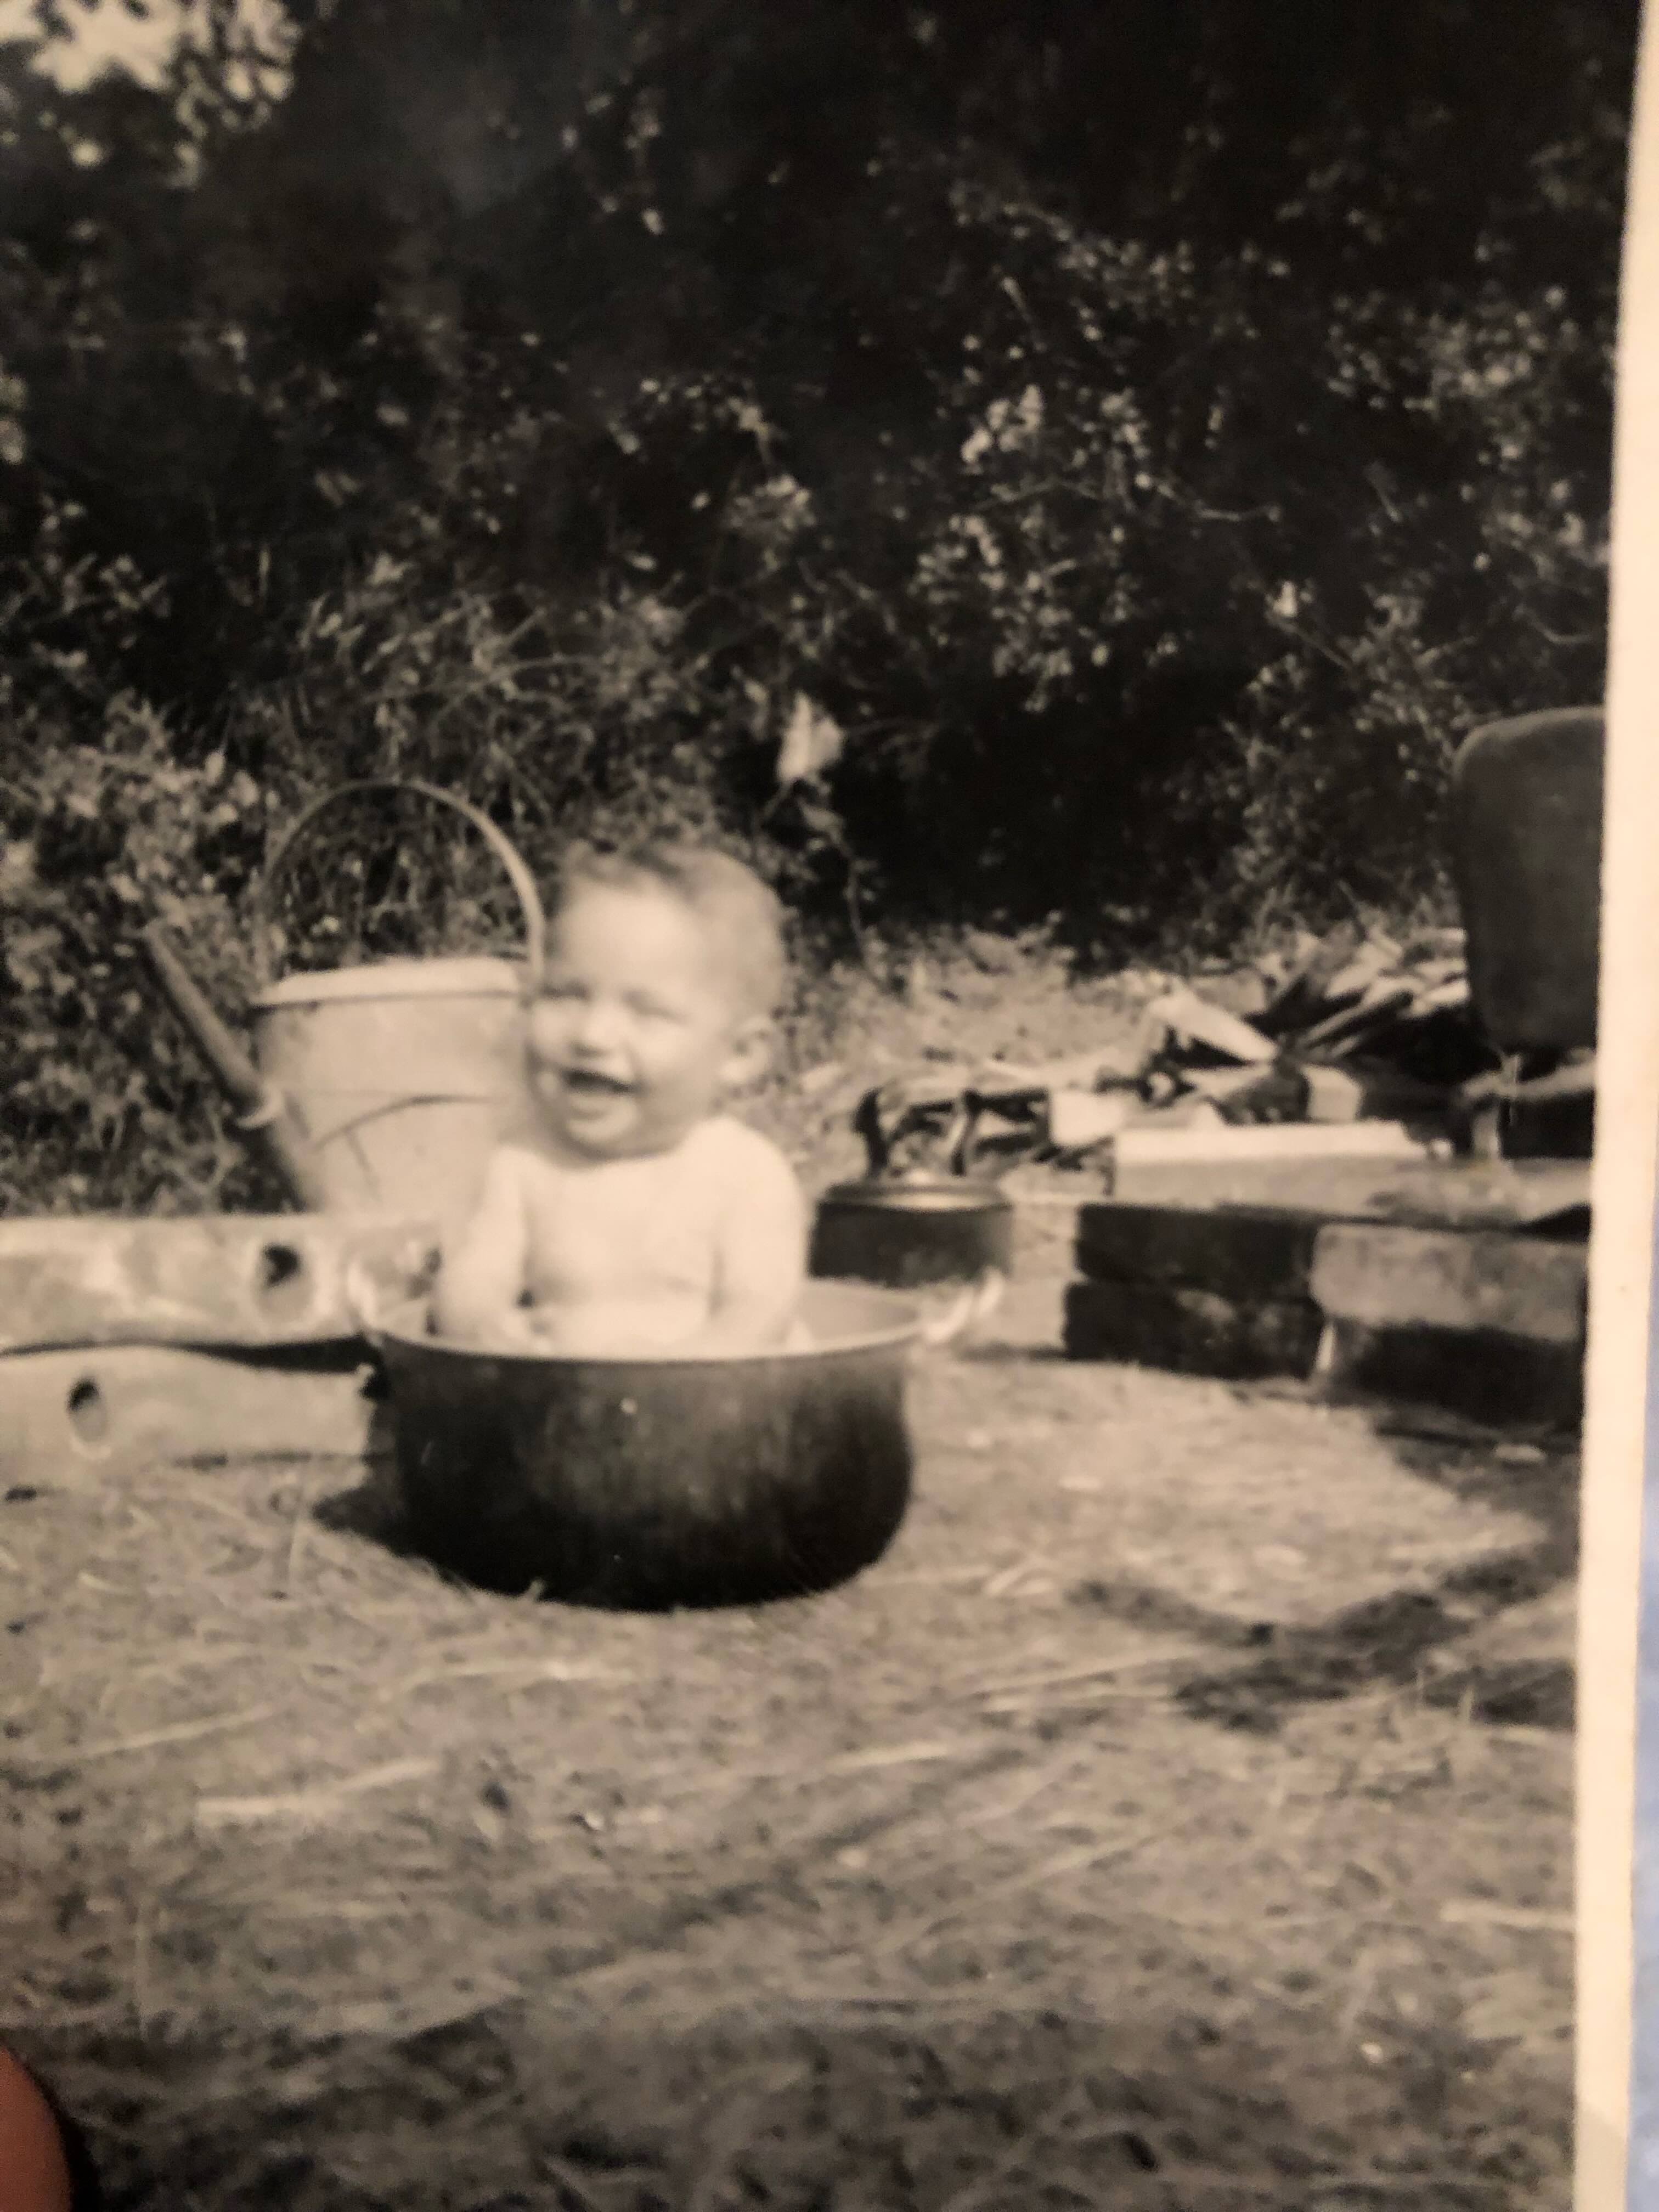 | 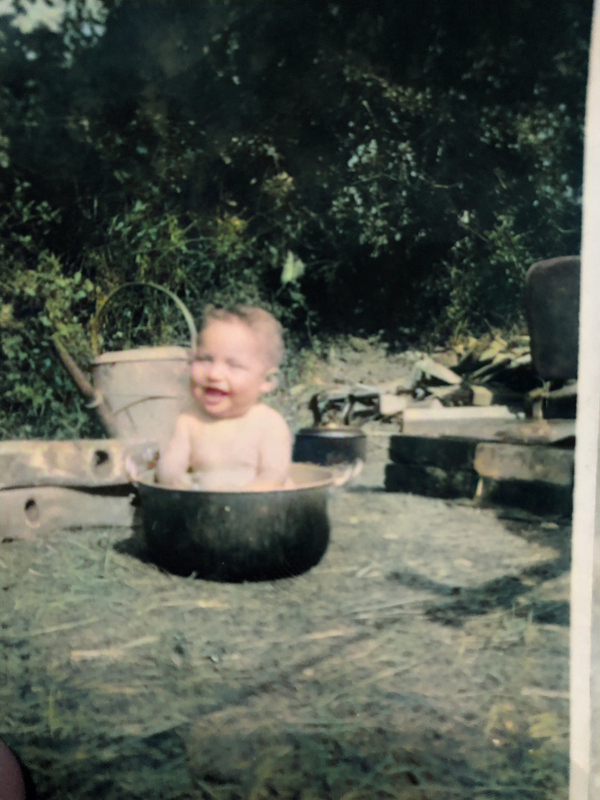 |
Using the Image Colorization API with Python#
1. Obtain an API key#
The first step to using the API is to get a free API key from DeepAI.
All you need to do is create an account (there is a “login with GitHub” option that I often like to use for these sorts of applications) and you’ll find your API key on your profile page.
If you want to experiment with the API first, you can use the demo API key quickstart-QUdJIGlzIGNvbWluZy4uLi4K for a few images.

I put this key into a file called secrets.py and immediately added it to the .gitignore file.
My secrets.py file looks like the following:
DEEPAI_API_KEY = "put your key here"This file will be imported into Python as a module, makign the DEEPAI_API_KEY available as a variable.
2. Prepare Python#
The only third-party (i.e. not built-in) package that is required for this is ‘requests’, so create a virtual environment (Python Virtual Environments: A Primer), activate the virtual environment, and install it before continuing.
python3 -m venv colorizer-env
source colorizer-env/bin/activate
pip install requests
or
conda create -n colorizer-env python=3.8
conda activate colorizer-env
conda install requests
3. Post an image to be colorized#
We are finally ready to send an image to the colorizer API. All of the code below will post an image located at “path/to/some/image.jpeg” to the API.
import requests
from secrets import DEEPAI_API_KEY
from pathlib import Path

image_path = Path("path/to/some/image.jpeg")

deepai_res = requests.post(
    "https://api.deepai.org/api/colorizer",
    files={"image": open(image_path, "rb")},
    headers={"api-key": DEEPAI_API_KEY},
)
The response of the request is contained in deepai_res.
It should look something like the following.
>>> deepai_res
<Response [200]>
>>> deepai_res.json()
{'id': '7b37e471-2f58-4a14-88f7-855bd5cfb6e5', 'output_url': 'https://api.deepai.org/job-view-file/7b37e471-2f58-4a14-88f7-855bd5cfb6e5/outputs/output.jpg'}
The colorized image should be visible if you follow the 'output_url' link.
4. Download the colorized image#
There are probably plenty of ways to download the JPEG image at the URL in the response, but I used the following method.
First, the requests.get() function is used to stream the object.
If the status code is 200, then the request was successful and the image can be downloaded and saved to disk.
If the status code is not 200, then something went wrong and the code is printed to standard out.
import shutil

# Where to save the image.
save_path = Path("path/to/output_image.jpeg")

# Use requests to get the image.
colorized_image_url = requests.get(deepai_res.json()["output_url"], stream=True)

# Check the status code of the request and save the image to disk.
if colorized_image_url.status_code == 200:
    with open(save_path, "wb") as save_file:
        colorized_image_url.raw.decode_content = True
        shutil.copyfileobj(colorized_image_url.raw, save_file)
else:
    # Print the status code if it is not 200 (something didn't work).
    print(f"image result status code: {colorized_image_url.status_code}")
Wrap up#
That’s pretty much about it - it is incredible how easy it is to use this complex DNN! These few lines of code can be wrapped into a function to make the process streamlined to run multiple files through the API. My implementation of that is below; it runs all of the images in a specific directory. However, I doubt it would be much harder to add a simple GUI to make it even more simple to use. I think I may try my hand at making a simple MacOS app for this, in the future.
Full script#
Here is my full script for running all of the images in “images/original-images/” through the colorizer API. Please, feel free to take the code as a whole or specific bits that you need.
import requests
import shutil
from pathlib import Path
from secrets import DEEPAI_API_KEY
from os.path import basename, splitext


def colorize(image_path, save_path, API_KEY):
    deepai_res = requests.post(
        "https://api.deepai.org/api/colorizer",
        files={"image": open(image_path, "rb")},
        headers={"api-key": API_KEY},
    )

    colorized_image_url = requests.get(deepai_res.json()["output_url"], stream=True)
    if colorized_image_url.status_code == 200:
        with open(save_path, "wb") as save_file:
            colorized_image_url.raw.decode_content = True
            shutil.copyfileobj(colorized_image_url.raw, save_file)
    else:
        print(f"image result status code: {colorized_image_url.status_code}")


images_dir = Path("images")
original_dir = images_dir / "original-images"
output_dir = images_dir / "colorized-images"

all_input_images = original_dir.glob("*jpg")
for input_image in all_input_images:
    output_name = splitext(basename(input_image))[0] + "_color.jpg"
    output_path = output_dir / output_name
    if not output_path.exists():
        print(f"Colorizing '{basename(input_image)}'...")
colorize(input_image, output_path, DEEPAI_API_KEY)Edits#
- Include the instruction to activate the Python virtual environment. (2021-06-04)